Wednesday, September 24, 2025
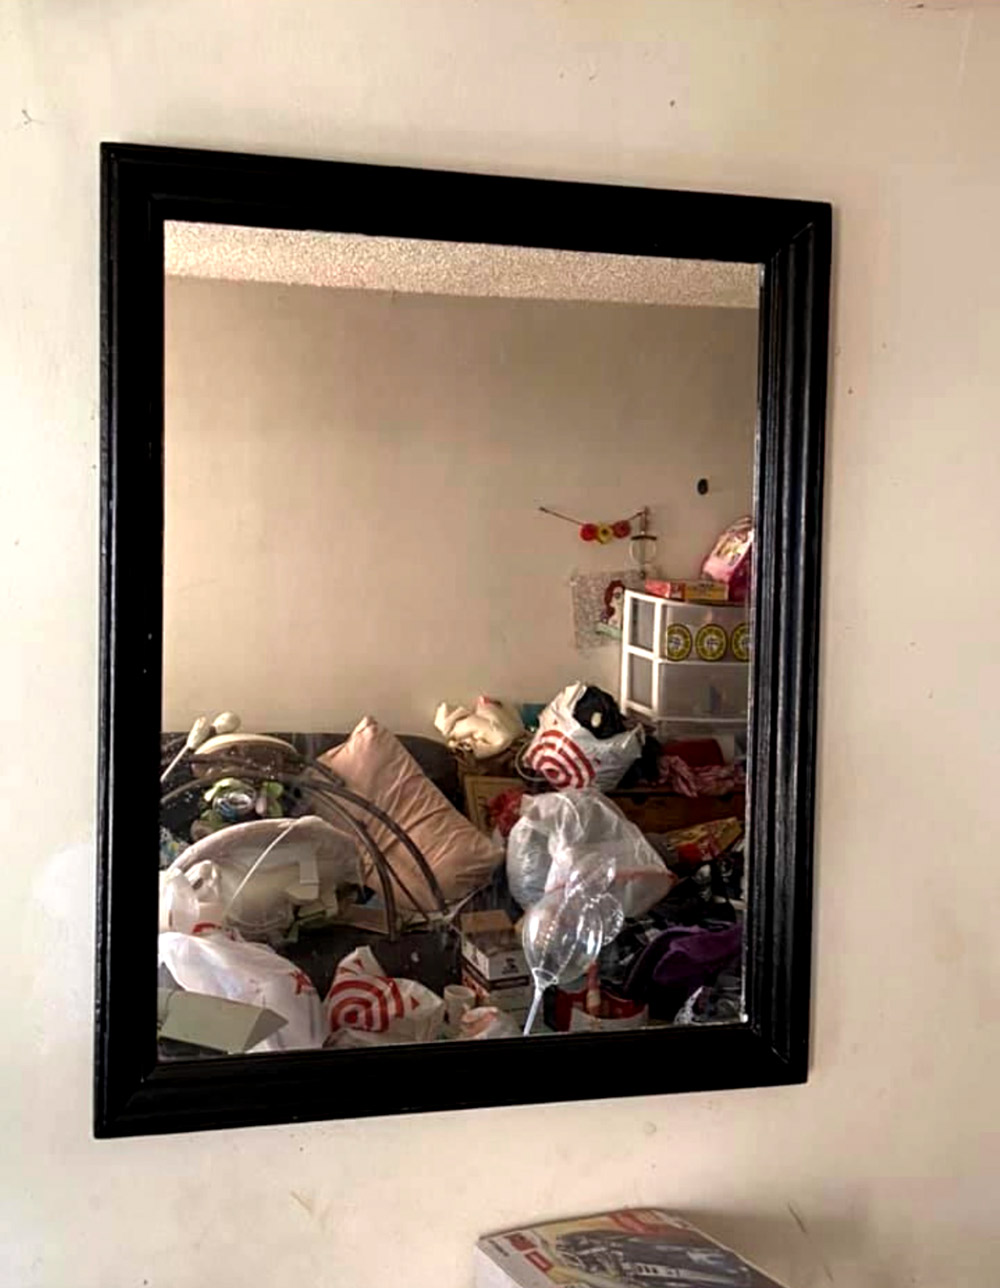
I was browsing resale sites to see where I can list my furniture, and I came across this post for this mirror 😳
What in the episode of Hoarders is going on here??? Respectfully, I would never buy anything from your filthy ass house, Rebecca B.
Tuesday, September 23, 2025
I’m abandoning my clear obsession with Mid-Century furniture (JK, I’m just moving to another apartment and buying new Mid-Century furniture that fits the space better). Anyone interested in buying some of it? Everything comes fully assembled, if that helps sway your decision at all – If you’d rather test your relationship by trying to assemble furniture together, I’ll just pray for you, I guess 🙏🏼

Full disclosure: All items are pick-up only in LA (Redondo Beach). I live on the third floor of my building, but there’s an elevator. You’ll need a second person to help you carry most of this shit to your car, so please bring a friend bc I ain’t the one 😅 Prices are already heavily discounted and firm.
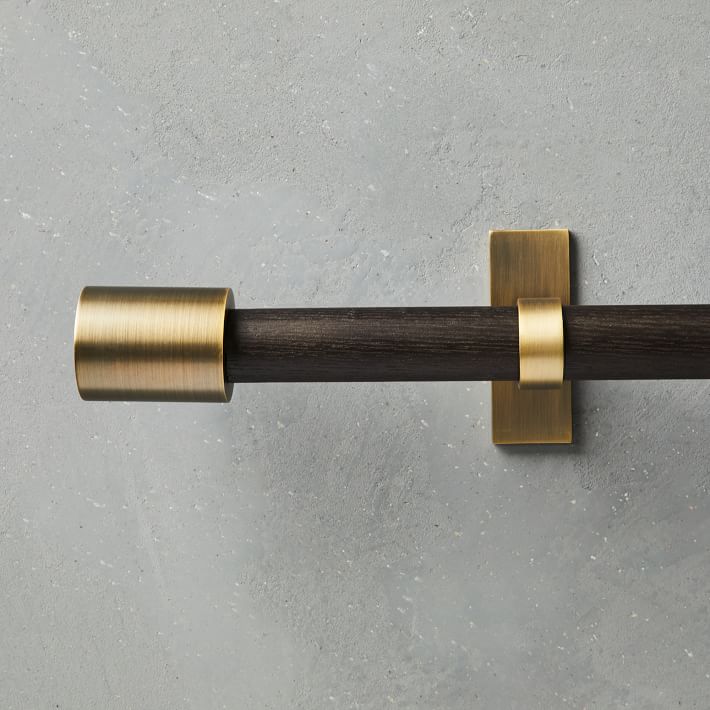
West Elm Mid-Century Adjustable Curtain Rod SOLD!
- Price: $60 (retails for $149)
- Condition: Like new. Put it up once and never touched it again. Smoke-free home.
- Dimensions: 44″-108″
- Finish: Carbon/Antique Brass
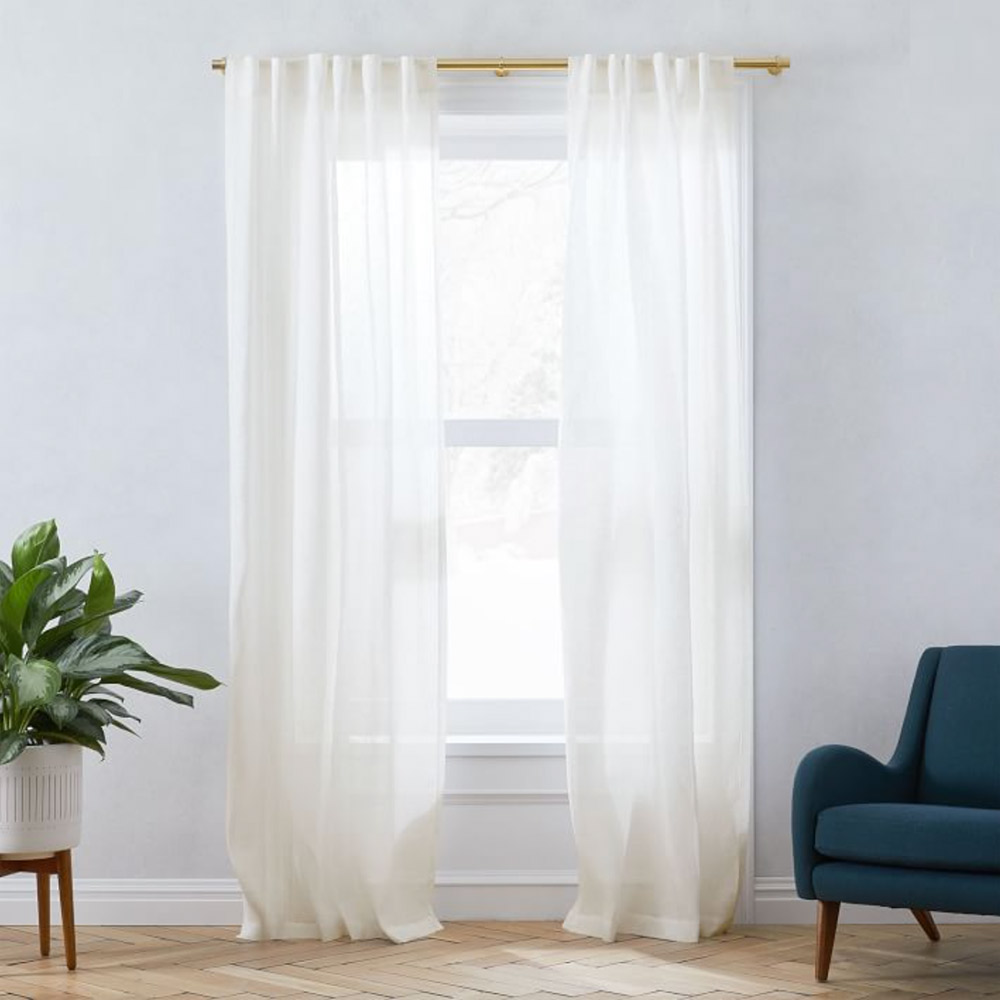
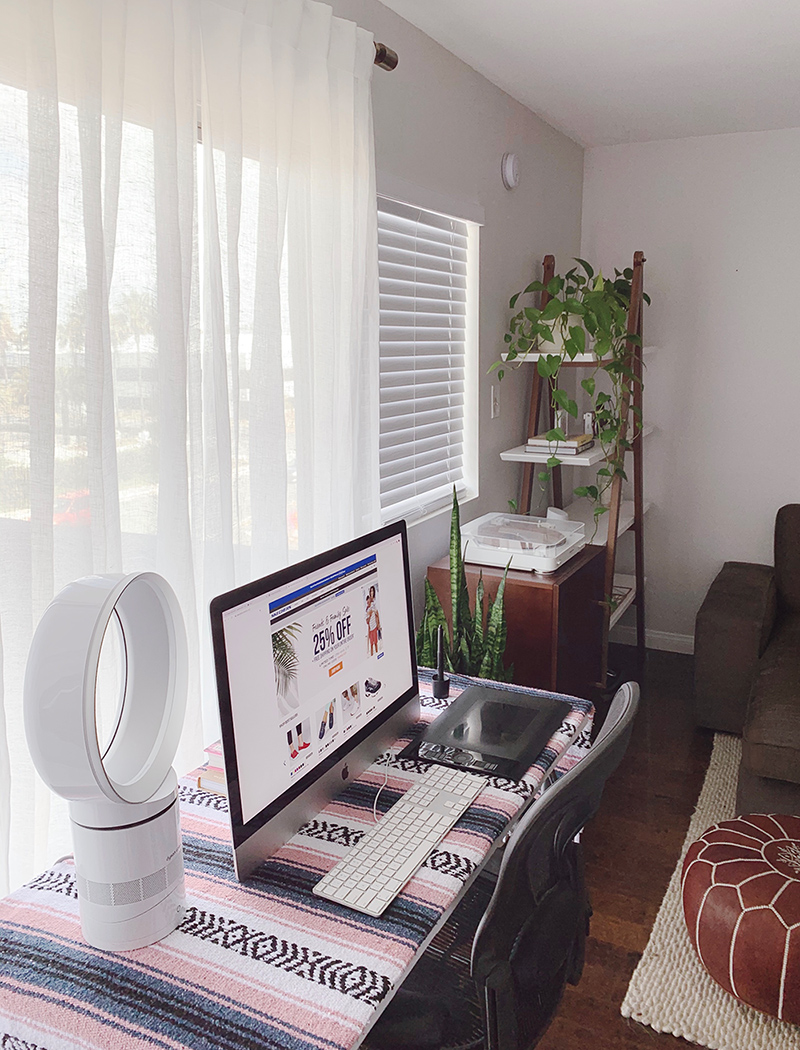
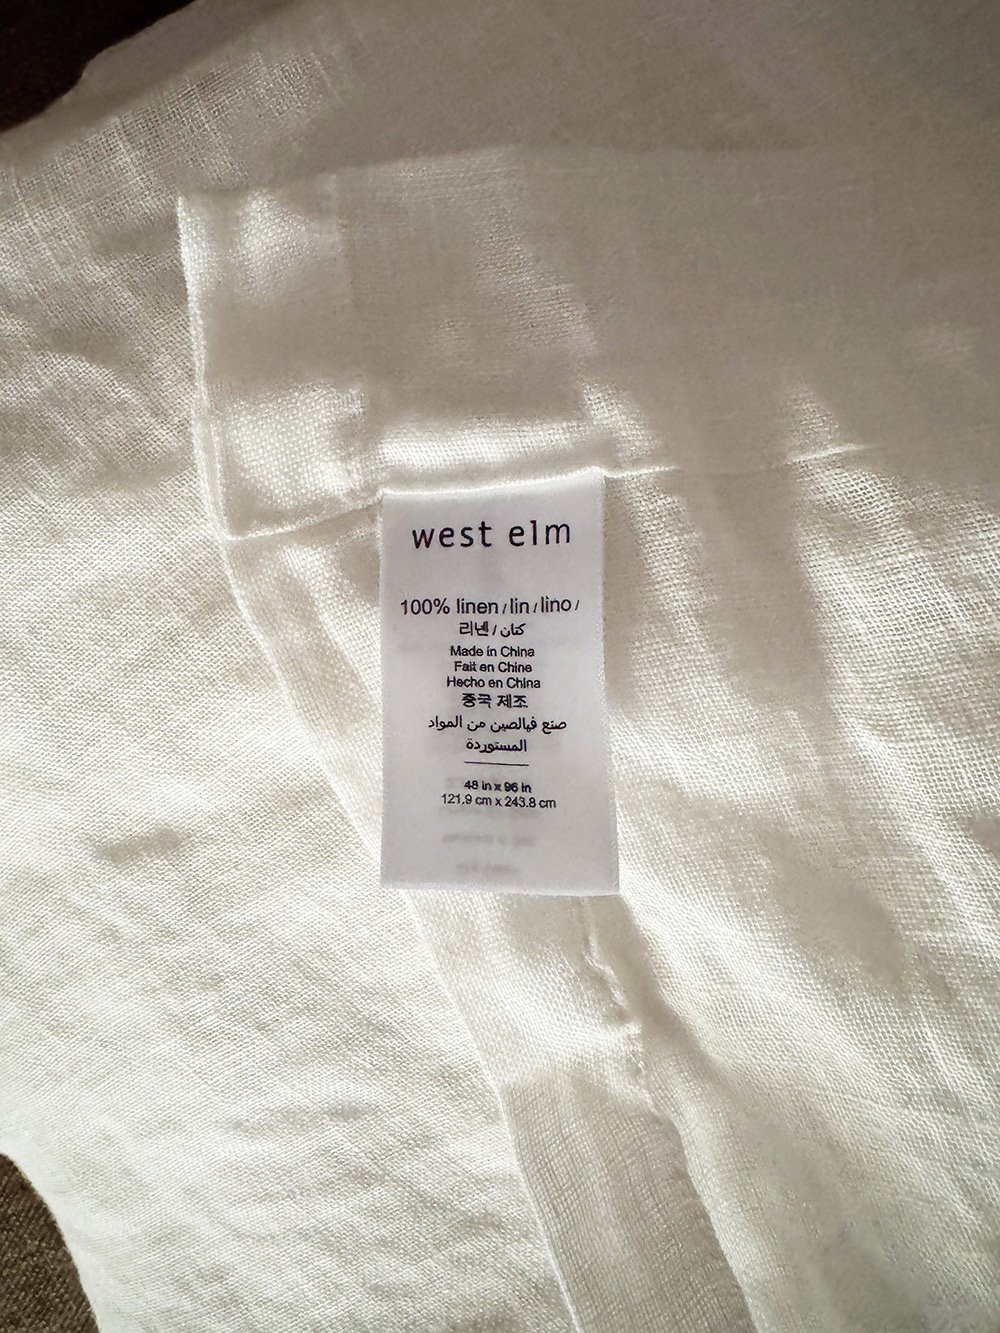
West Elm White Sheer European Flax Linen Curtains, Set of 4
- Price: $100 for the set of 4 (retails for $436)
- Condition: Like new. Smoke-free, pet-free home. No stains. Freshly laundered.
- Dimensions: Each panel – 48″ (W) x 89″ (L) (originally 96″ L, but professionally tailored to 89″ L with tags kept on)
- Features: Woven from premium flax and washed for a luxe, lived-in look. Adds lightweight texture to windows. Soft drapery lets in bright, gently diffused light. Crafted in a Fair Trade Certified™ facility.
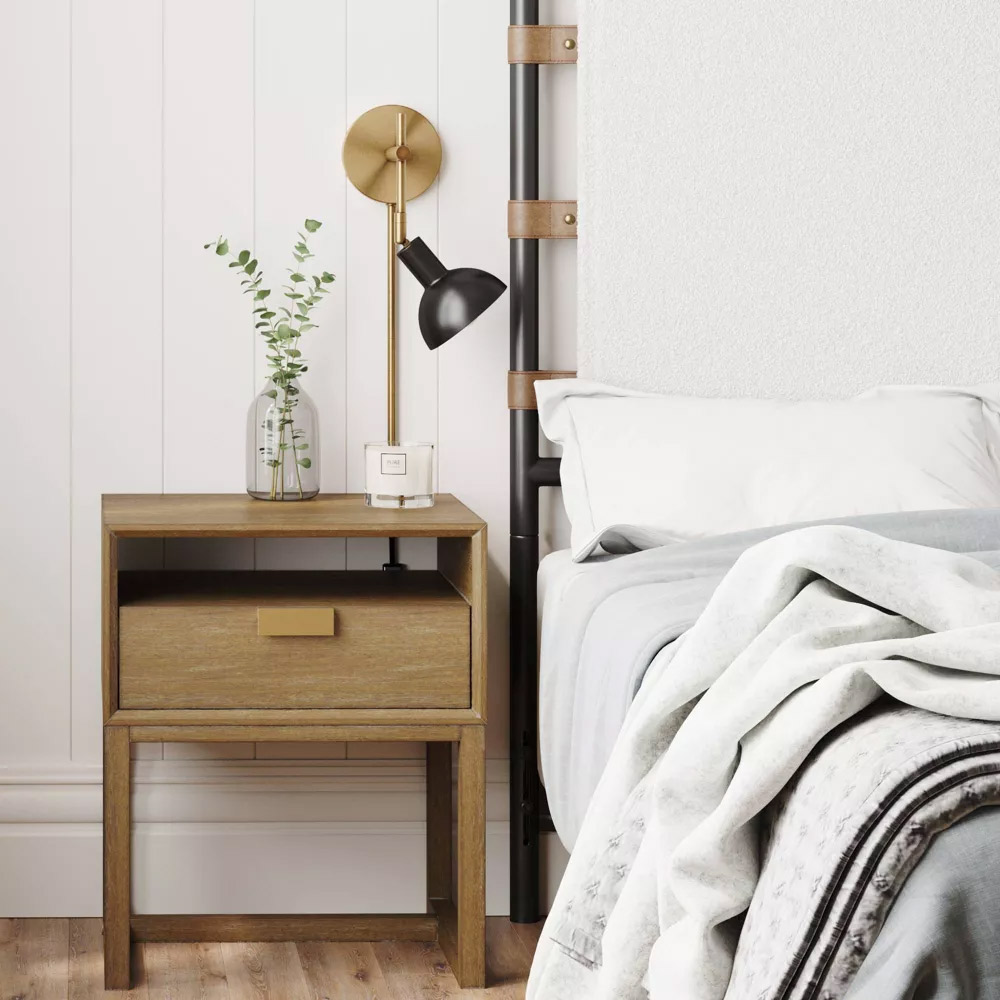
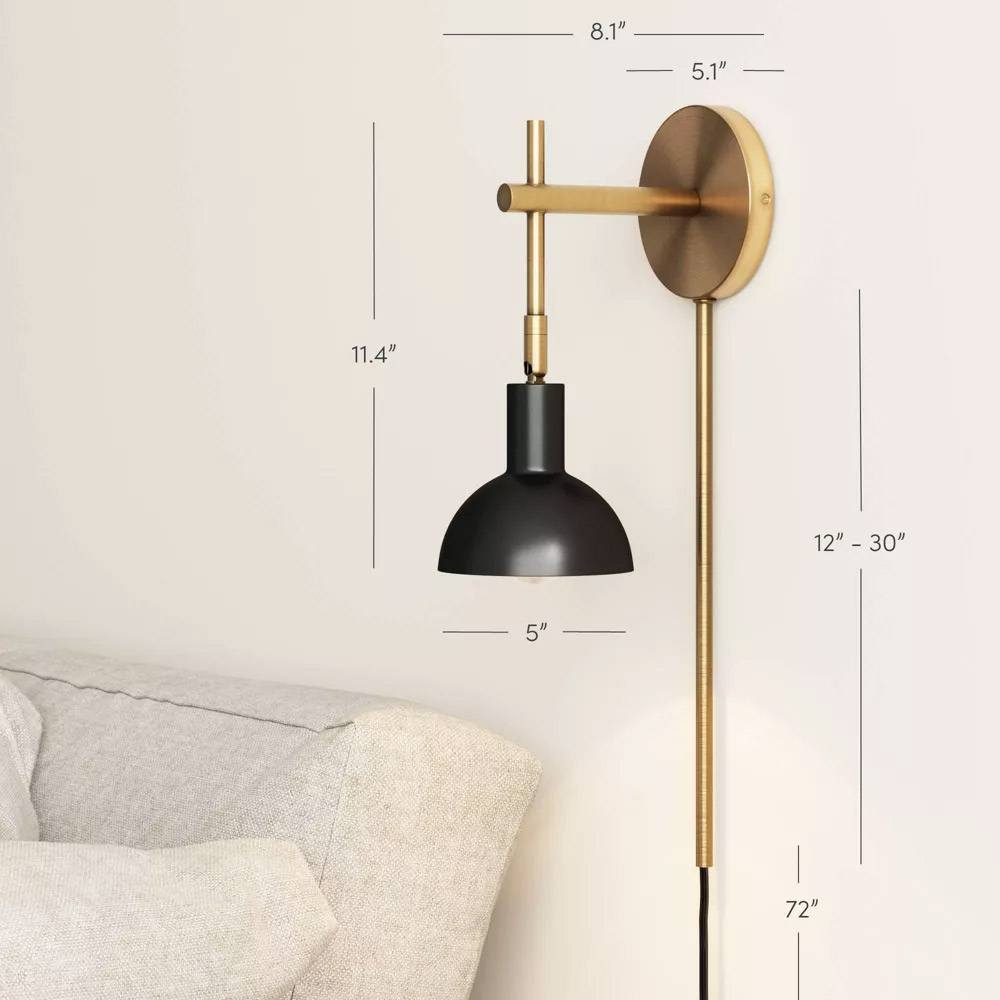
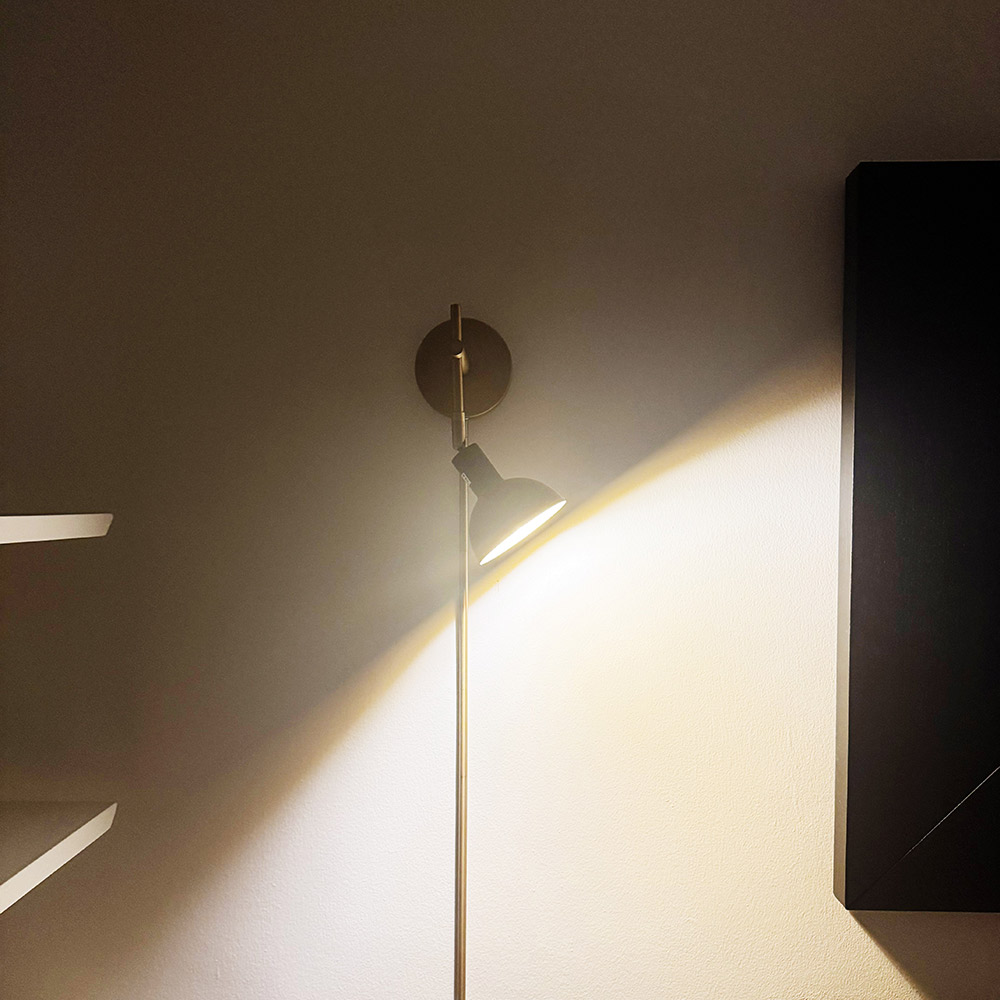
Nathan James Tamlin Wall Light Fixture (comes with light bulb)
- Price: $40 (retails for $75.99)
- Condition: Like new. Smoke-free home.
- Features: Renters rejoice! Meet Tamlin, our plug-in wall light perfect for reading nooks, living rooms, and bedsides. Extending from a circular wall plate is an elegant vintaged brass finish metal arm with a matte black round bell shade. Its articulating feature allows you to direct the light left or right and is dimmer compatible, for those nights you can’t put your book down. This wall light is a must-have for small spaces, apartments, and townhomes and can be placed in your favorite spot without worry thanks to the included cord cover.
- Finish: Antique Brass/Matte Black
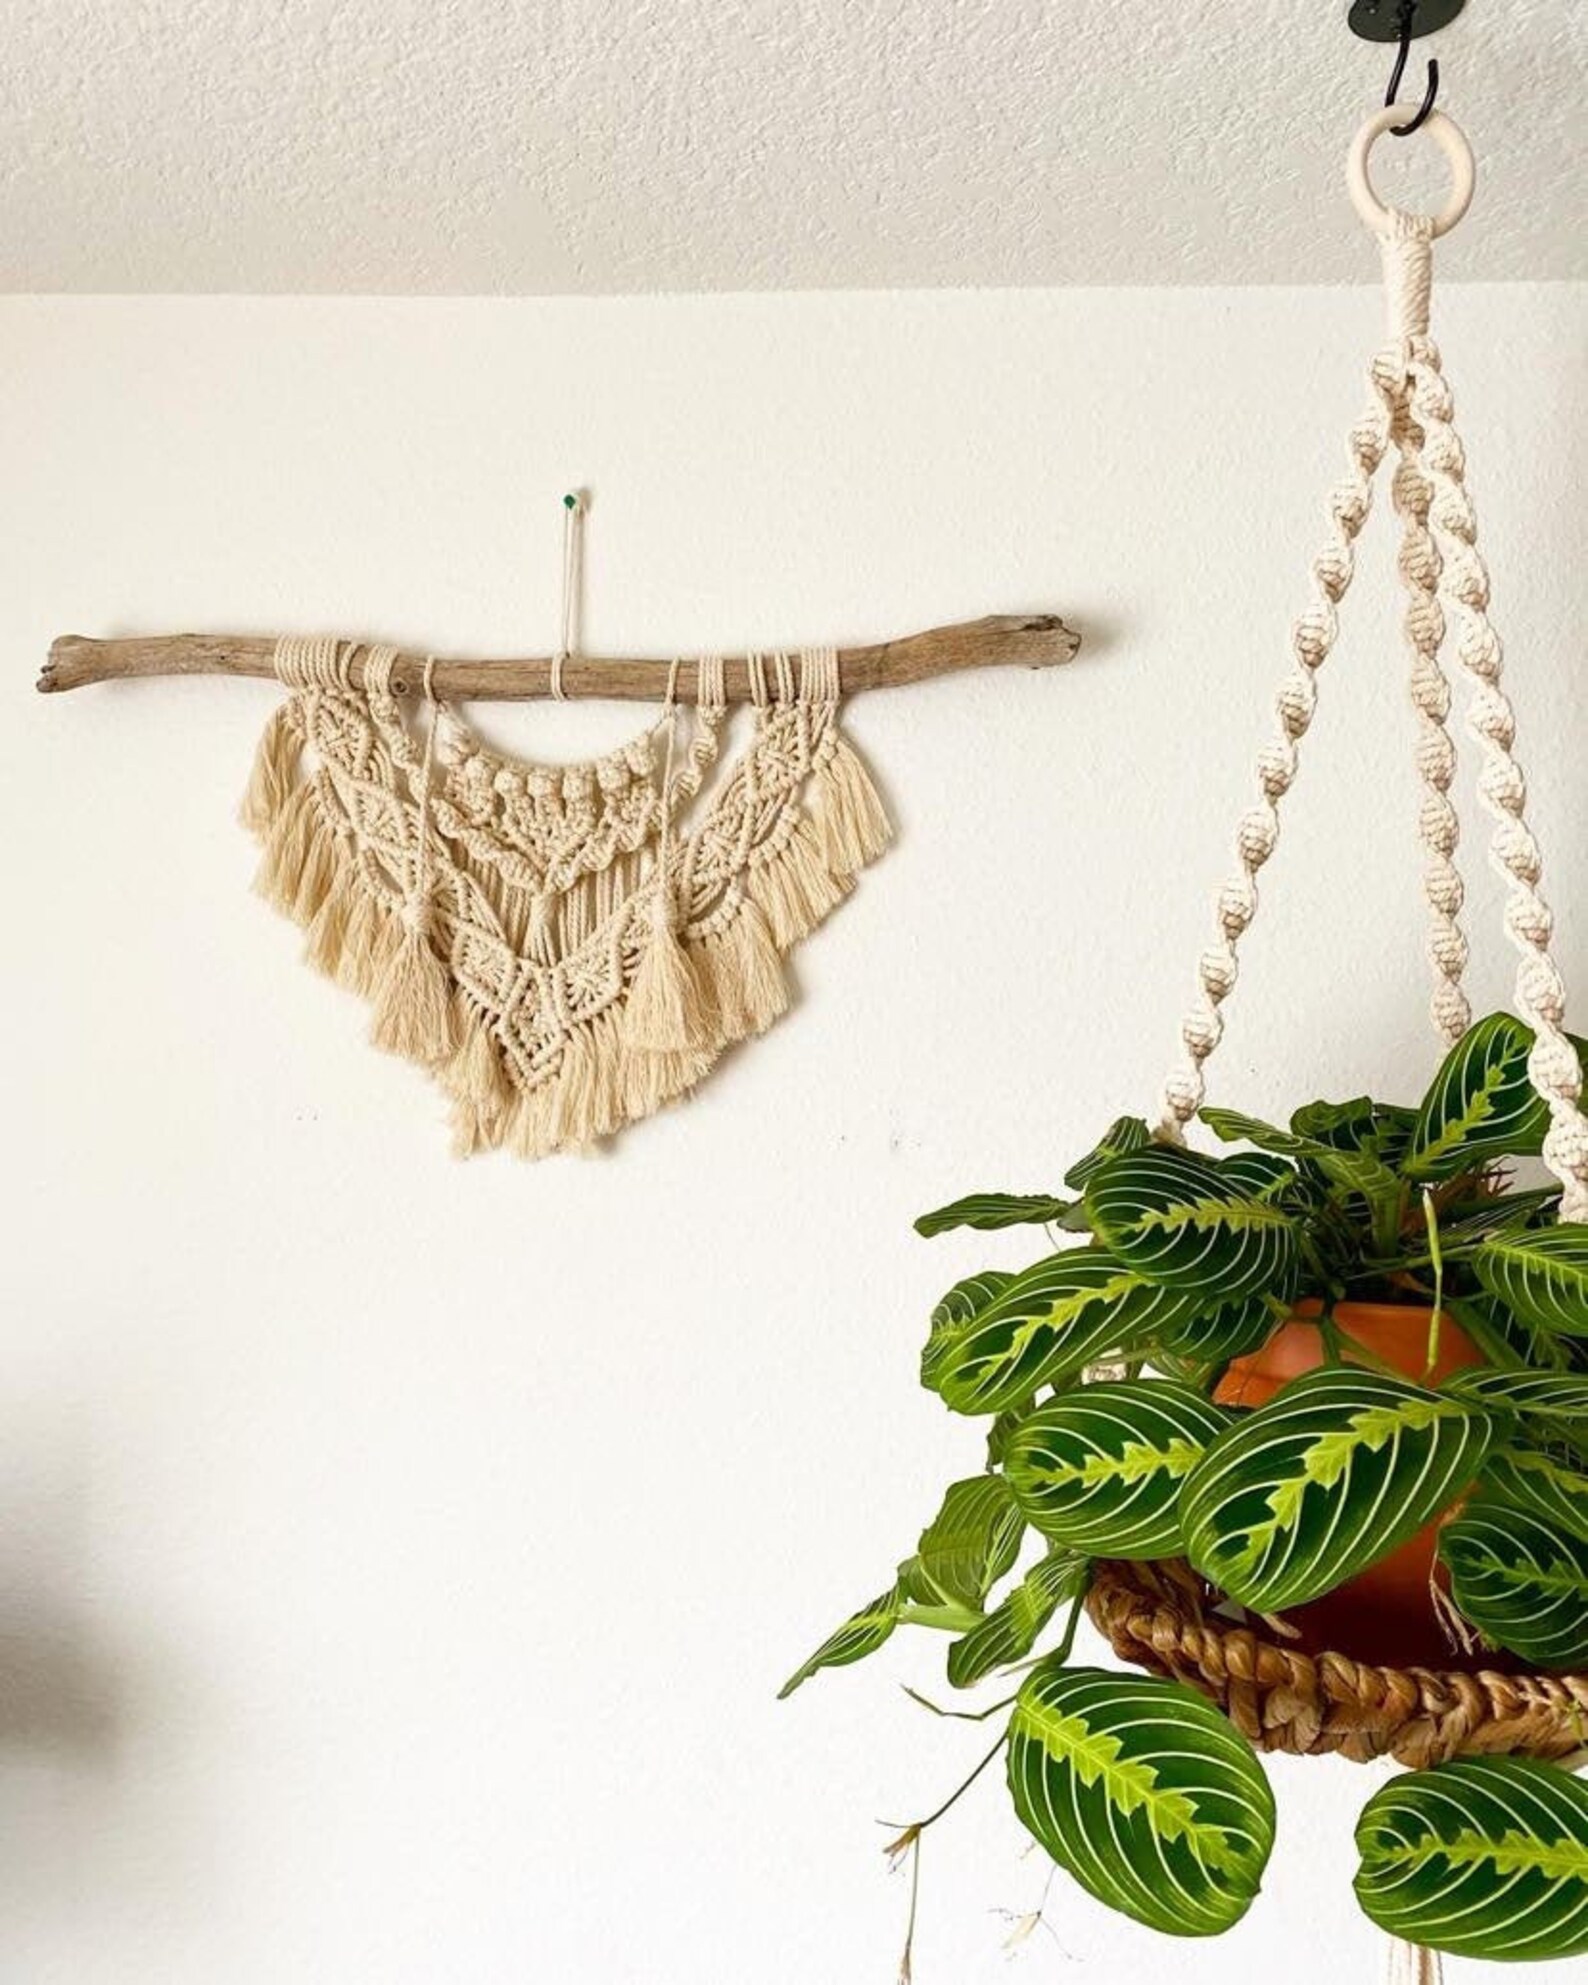
Boho Driftwood Macrame Wall Hanging
- Price: $40 (retails for $70)
- Condition: New. Never been used.
- Features: Hanging length is easily adjustable
- Dimensions: 32″ (W) x 15″ (H)
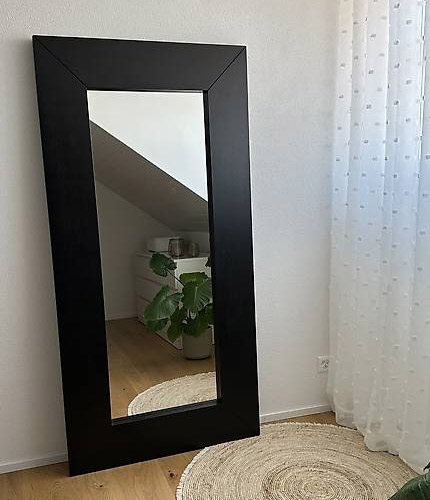
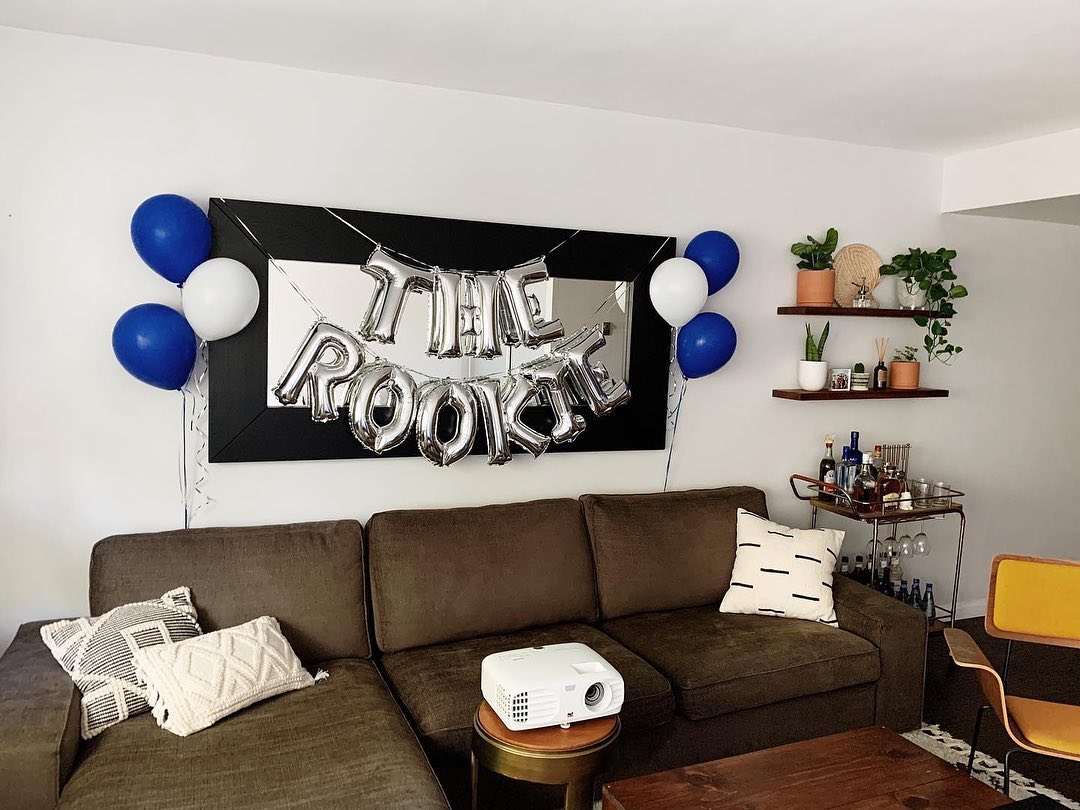
Ikea Mongstad Mirror
- Price: $80 (retailed for $200 – now discontinued and highly coveted according to the internet)
- Condition: Like new. Put it up once and never touched it again. Smoke-free home.
- Dimensions: 37″ (H) x 75″ (W) x 2″ (D)
- Features: This large versatile mirror can be used in several ways. You can lean it against a wall or hang it both vertically or horizontal. I hung it horizontally with two screws and a prayer, and it has stayed up for 13 years through several California earthquakes.
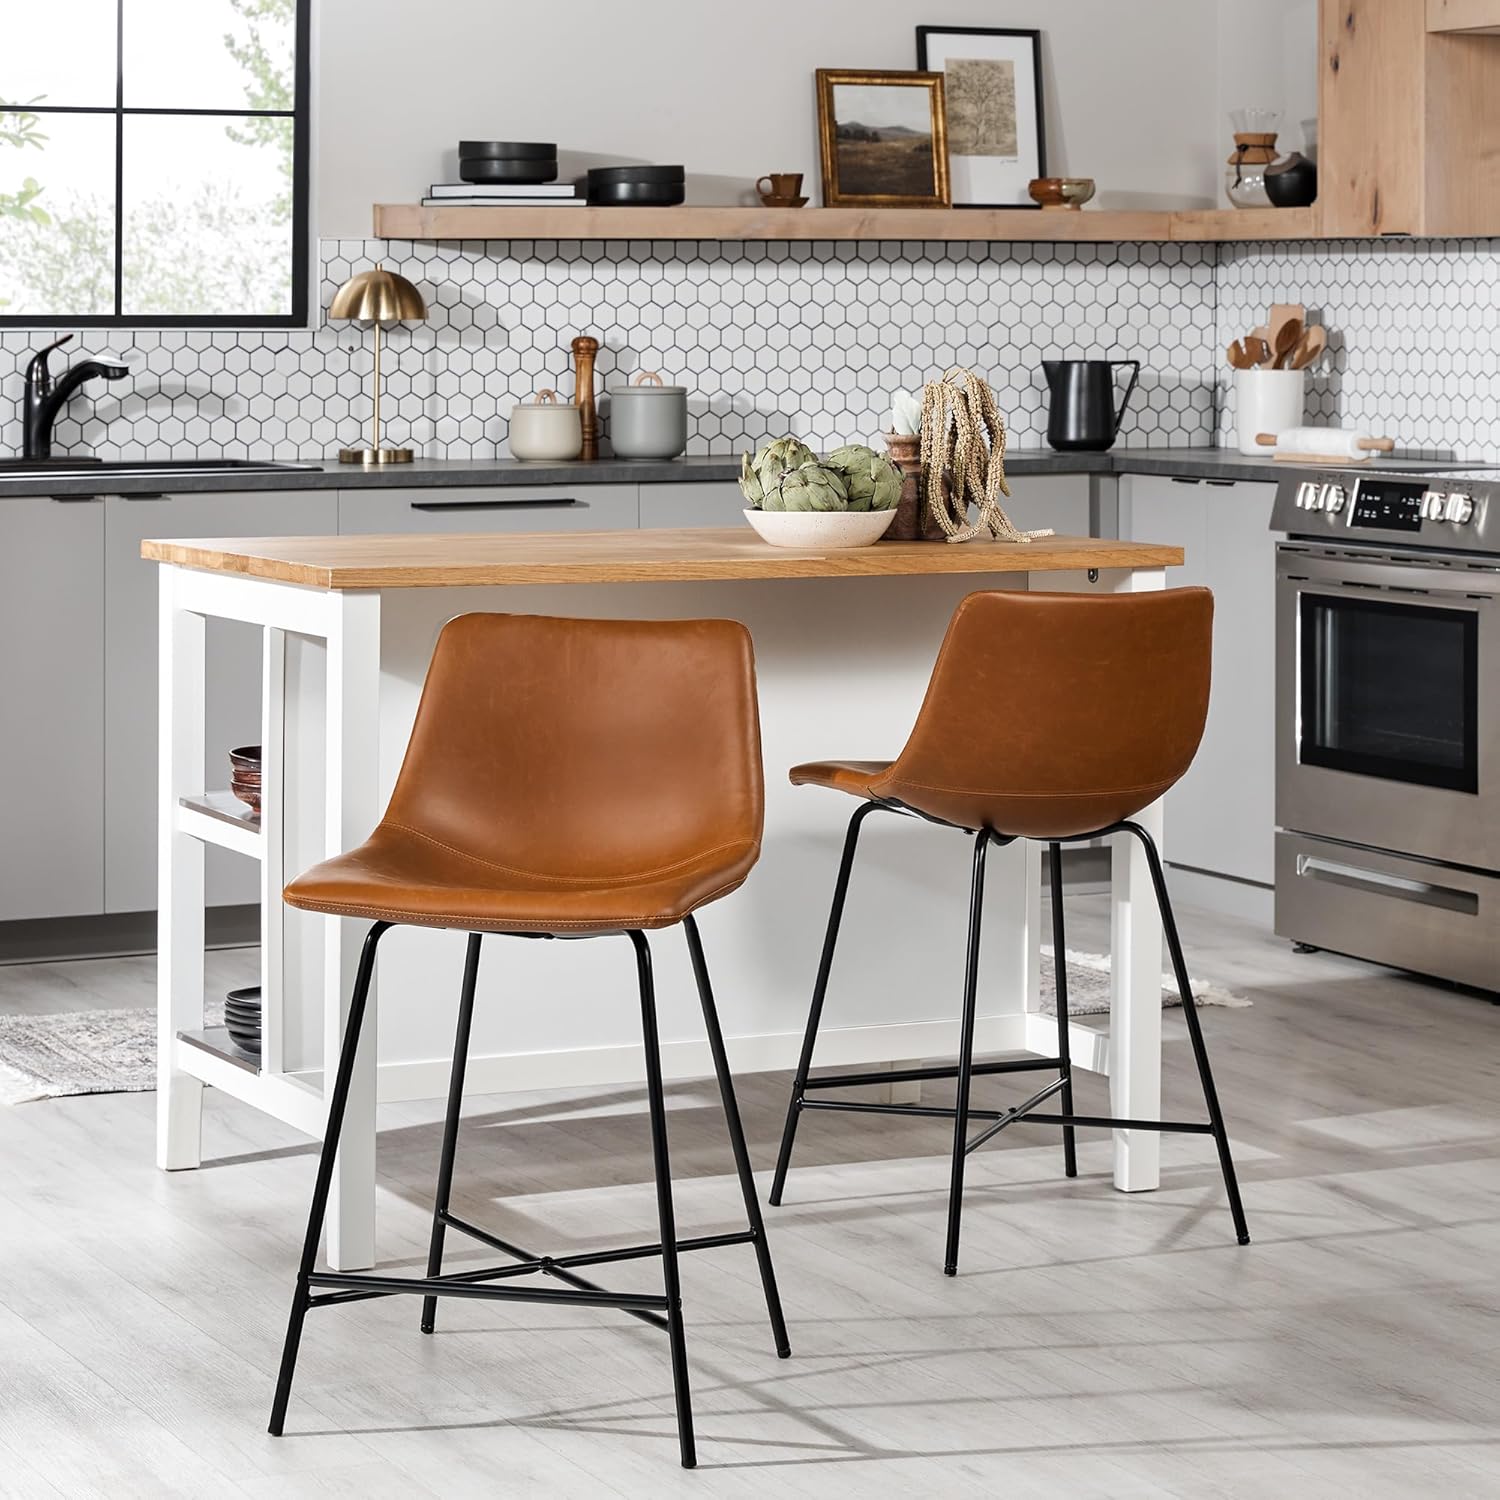
Walker Edison Xuma Modern Armless Low Back Counter Stool, Set of 2 SOLD!
- Price: $60 for set (retails for $159)
- Condition: Like new. Used mostly for decor only.
- Features: Upholstered in high-quality synthetic leather for a stylish and easy-to-clean finish. Sturdy steel legs provide reliable support and enhance the modern design.
- Dimensions: 34 1/2″ (H) x 19″ (W) x 22″ (D)
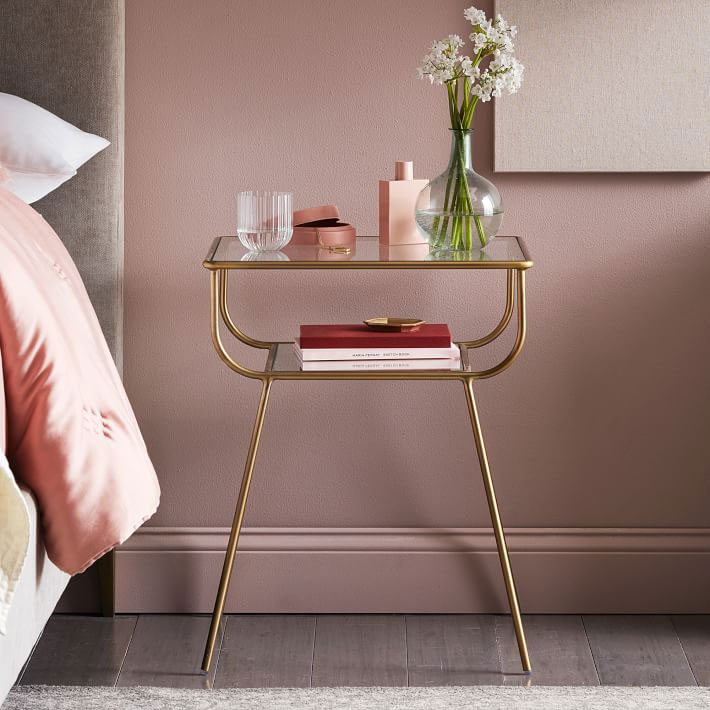
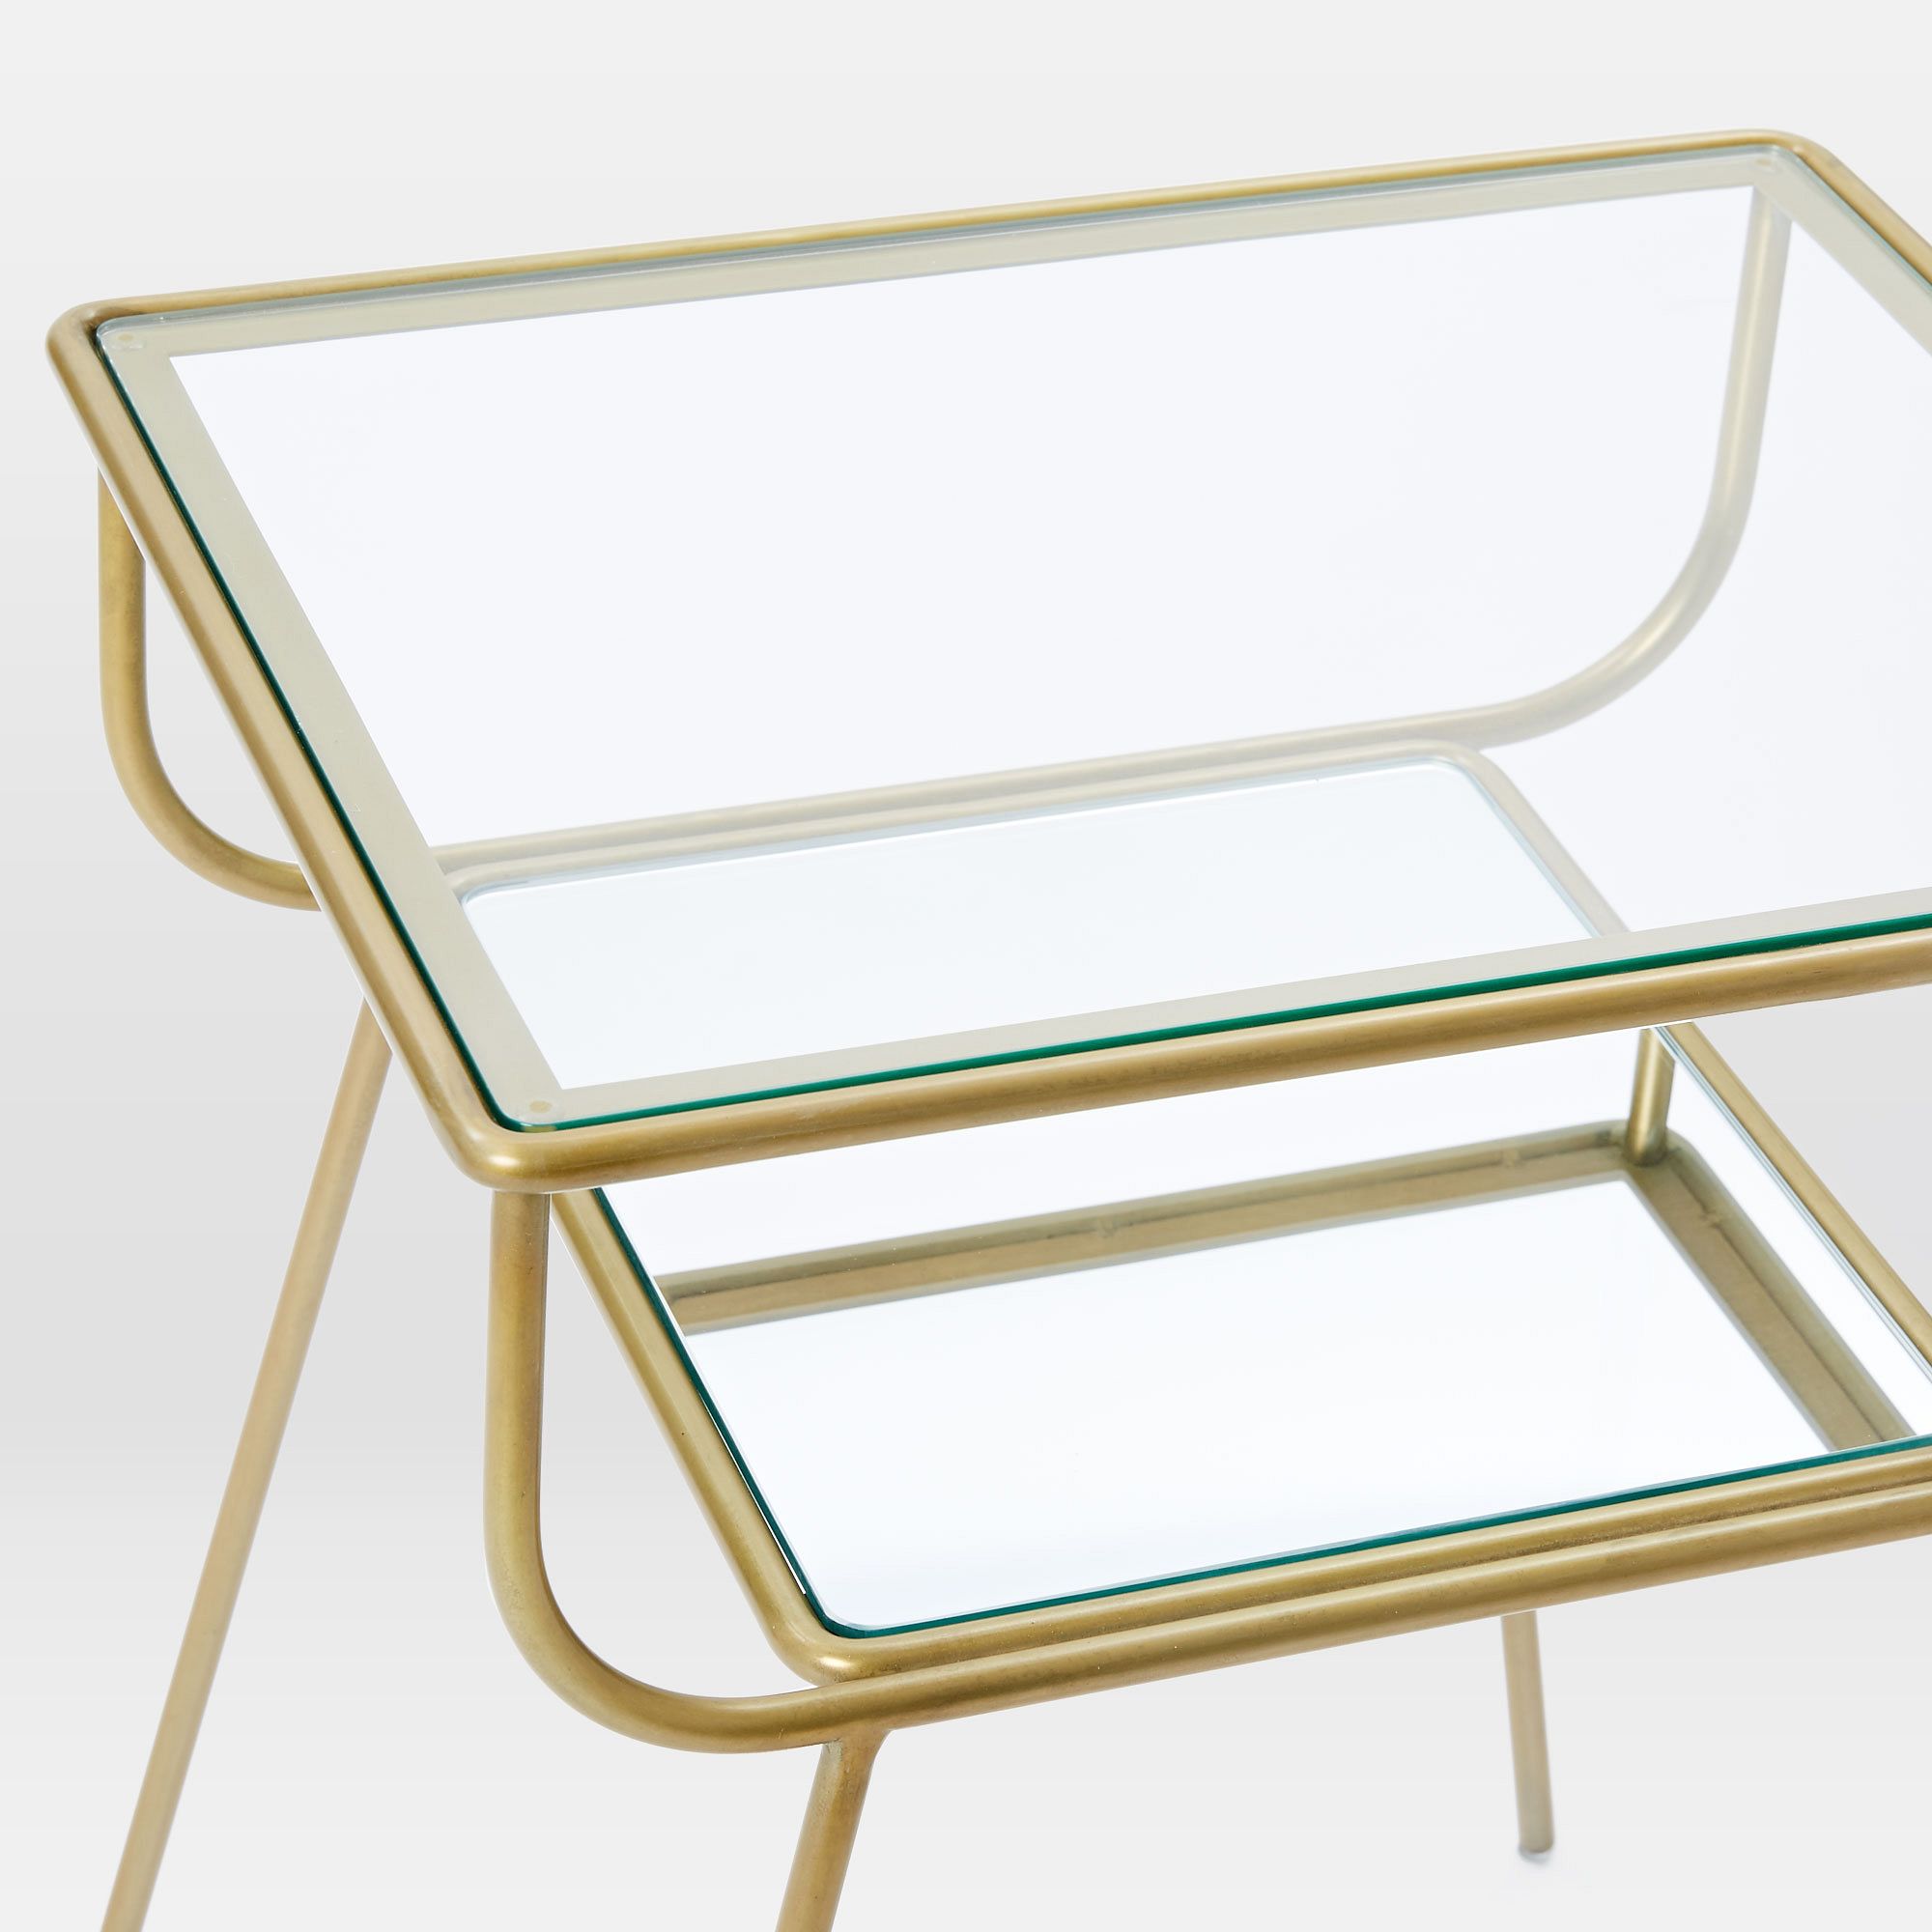
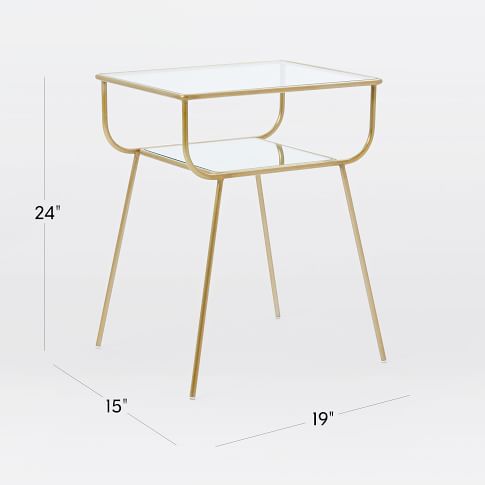
West Elm Curved Terrace Nightstand SOLD!
- Price: $100 (retailed for $199, now discontinued)
- Condition: Like new. Smoke-free home.
- Dimensions: 24″ (H) x 19″ (W) x 15″ (D)
- Features: The goes-with-anything Antique Brass finish is easy to integrate into modern and traditional decors alike. This airy nightstand’s bottom shelf is mirrored, reflecting up toward the wide, tempered glass top.
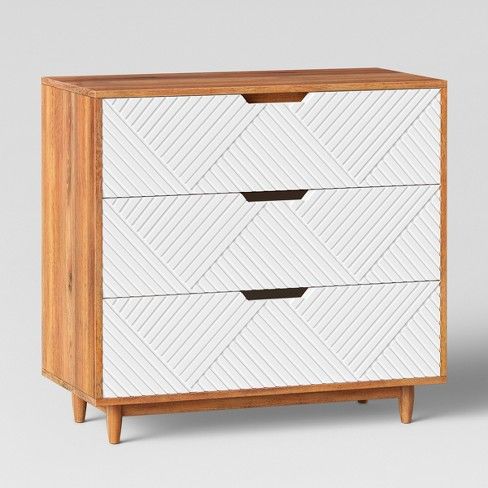

Opalhouse Mid-Century Touraco Dresser
- Price: $100 (retailed for $260 unassembled – now discontinued)
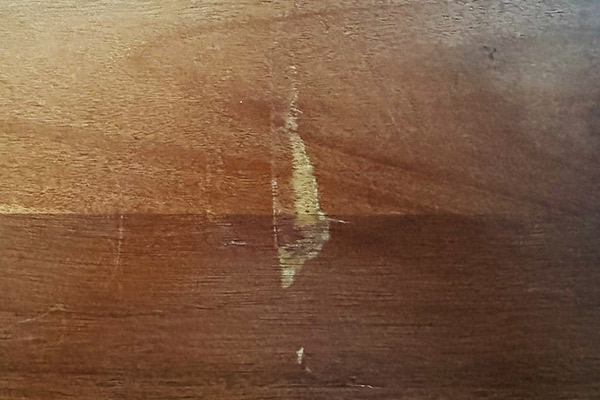
- Condition: Top wood has imperfections on the bottom right where my iPad got stuck to it on a hot summer day 🤪 (shown above), but you can cover the top with a cool Mexican blanket like I have 💃🏻 Otherwise in great condition.
- Features: Decorative 3-drawer dresser keeps things stored in style. White and brown colors create an eye-catching look perfect for any space. Neutral colors blend seamlessly with any color scheme.
- Dimensions: 34″ (H) x 36″ (W) x 18″ (D)
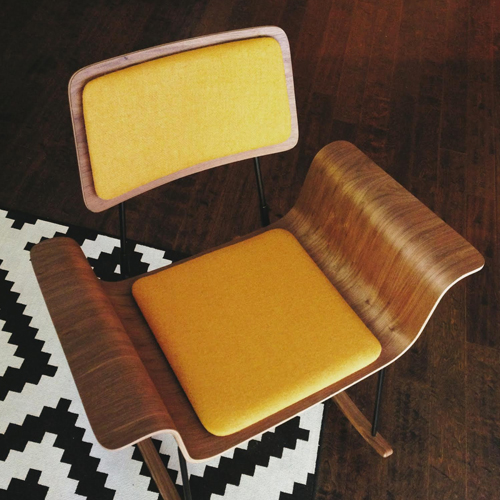
OneFortyThree Mid-Century Modern Roxy Rocker SOLD!
- Price: $100 (retails for $775)
- Condition: Barely used, was mostly for decor only, wood has normal wear and tear
- Features: Molded plywood shell crafted from natural real veneer Walnut. The molded shape is designed for comfort, with dense 1″ thick foam pads providing extra comfort with a low profile. Padding is upholstered in genuine Harris Tweed in Sunshine Yellow. The base is made from welded steel fabricated in-house, powder-coated in satin black. The solid wood rocker skids are durable and crafted from solid wood for a smooth rocking motion.
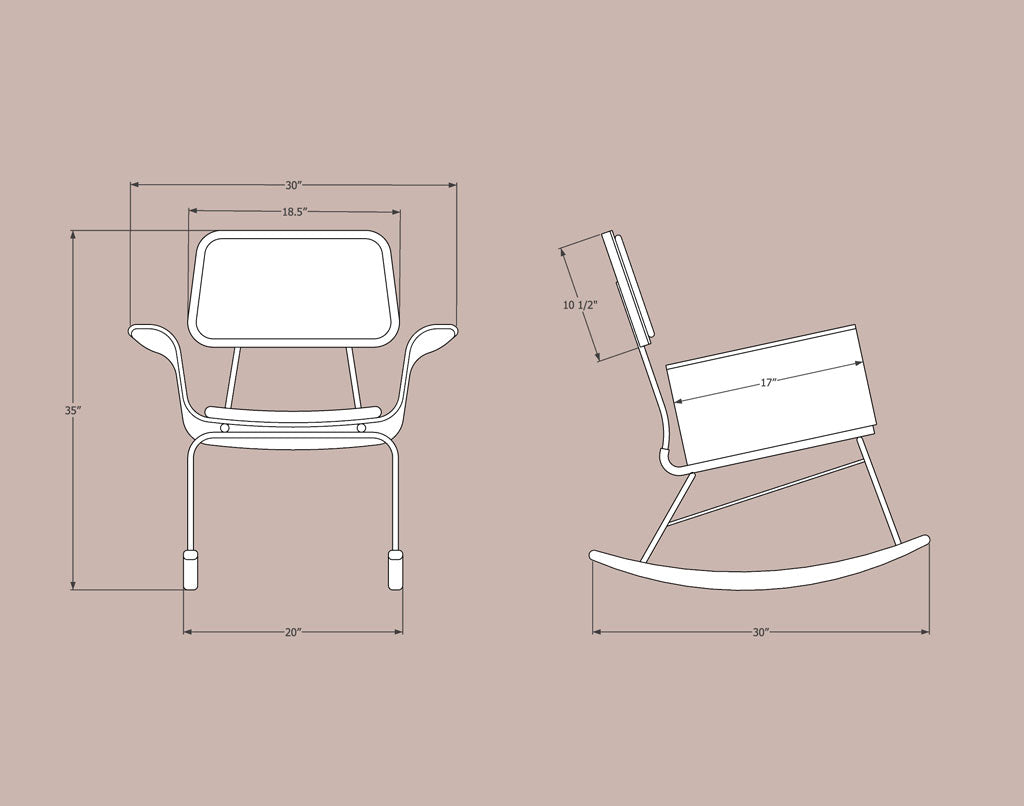
- Dimensions: 35″ (H) x 30″ (W) x 30″ (D)
Mid-Century Modern Side Table
- Price: $60
- Condition: Like new
- Features: Made in LA. Brown wood with 12″ hairpin legs made of welded steel.
- Dimensions: (Overall) 19″ (H) x 20″ (W) x 14.5″ (D)
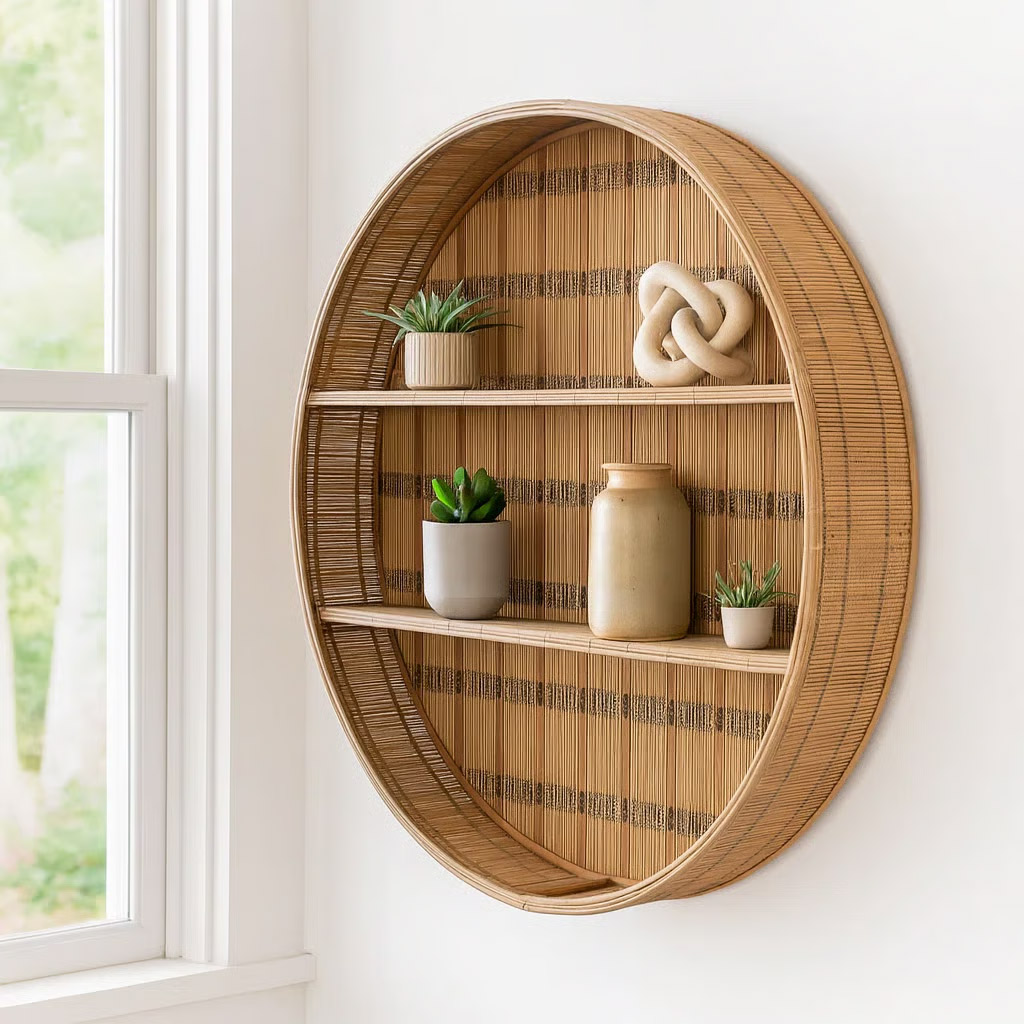
Round Wood Boho Design Wall Storage Bamboo Shelf SOLD!
- Price: $60 (retails for $149 on Wayfair)
- Condition: New in opened box, never been used. Smoke-free home.
- Features: Large 31″ Round Frame – This spacious round wall shelf lets you display photos, candles, and plants without clutter, helping you keep your room stylish and organized. Natural Bamboo & Wood Build – Crafted with eco-friendly bamboo and wood, this boho wall decor adds warmth and texture while providing durable wood wall storage. Versatile Home & Office Use – Whether mounted in a bedroom, living room, or office, this round wall shelf enhances any space with charm and practical functionality. Two-Tier Storage Design – With two wide shelves, this bamboo shelf solves the problem of small-space storage, giving you plenty of room for daily essentials or decor. Timeless Boho Style – The handcrafted woven look and natural brown finish offer a unique boho wall decor piece that effortlessly uplifts modern, rustic, or eclectic interiors.
- Dimensions: 31″ (H) x 31″ (W) x 5″ (D)
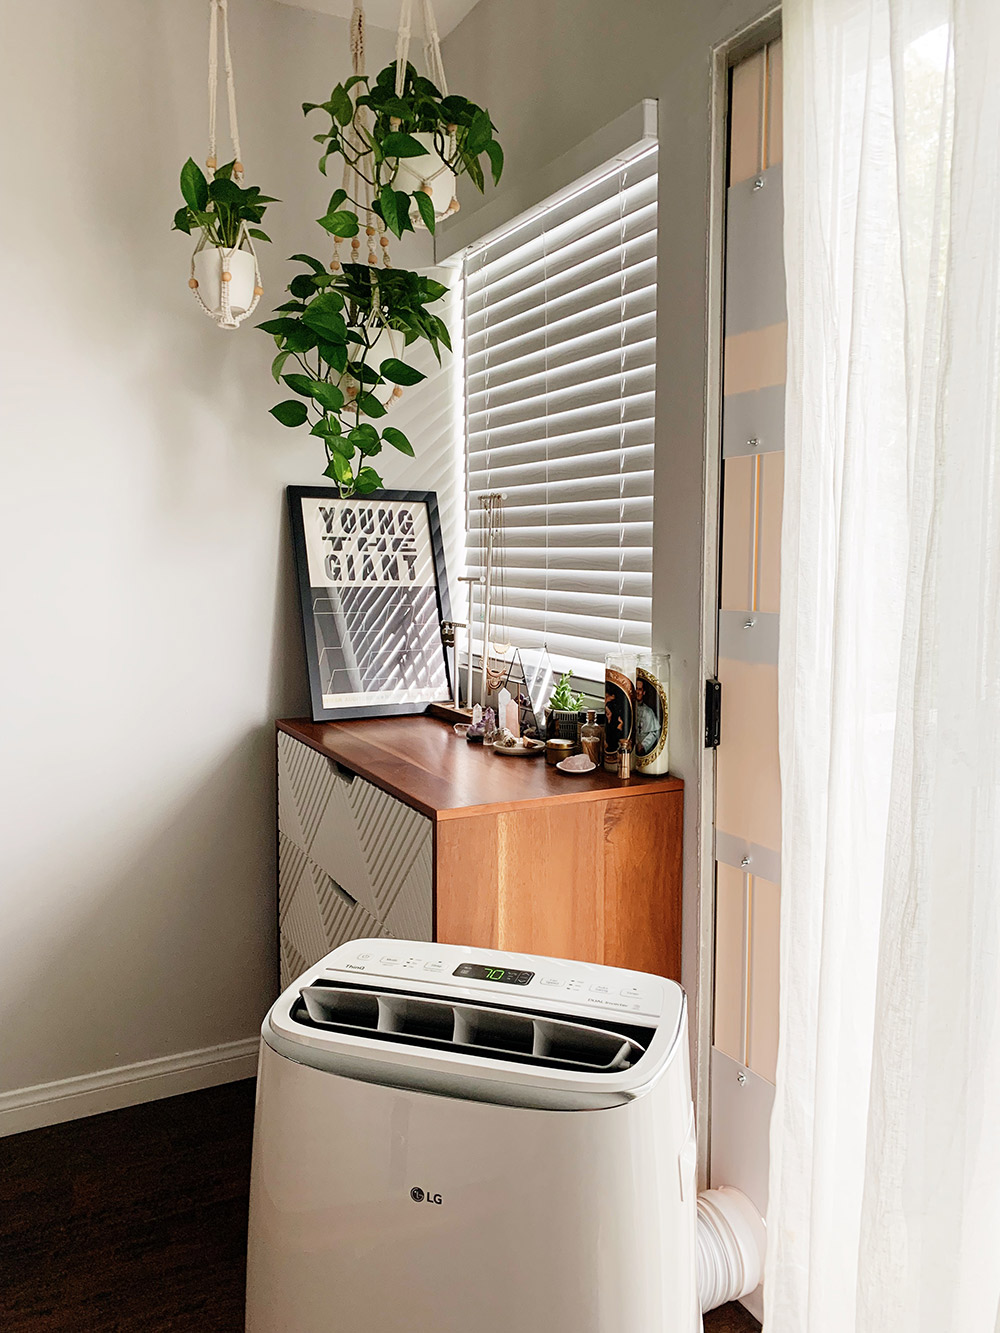
LG Smart Dual Inverter Portable Air Conditioner with 10000 BTU Cooling Capacity, 500 sq. ft. Cooling Area, in White with Sliding Door Kit
- Price: $300 includes sliding door kit (retails for $649 without sliding door kit)
- Condition: Like new
- Features: Saved my life during The Great Heat Wave of 2022. Works fast to cool down my 500 sq. ft. studio. The LG DUAL Inverter air conditioners are the best in cooling innovation. This ultra quiet unit operates at 44 dB in sleep mode, almost as quiet as a library. In addition, the DUAL Inverter allows the unit to operate efficiently saving you as much as 40% on energy costs. 3 cooling and fan speeds and a 24 hour timer allow you to create a cooling schedule to suit your needs. The auto-swing air vent helps direct the flow of air where It is needed most whether cooling, dehumidifying or just circulating air. If there is a power outage, the auto restart feature will automatically turn your unit back on when power is restored. Other features include a remote control, easy rolling casters, removable/washable filter and a check filter alert.
- Dimensions: 30.43″ (H) x 19.41″ (W) x 18.11″ (D)
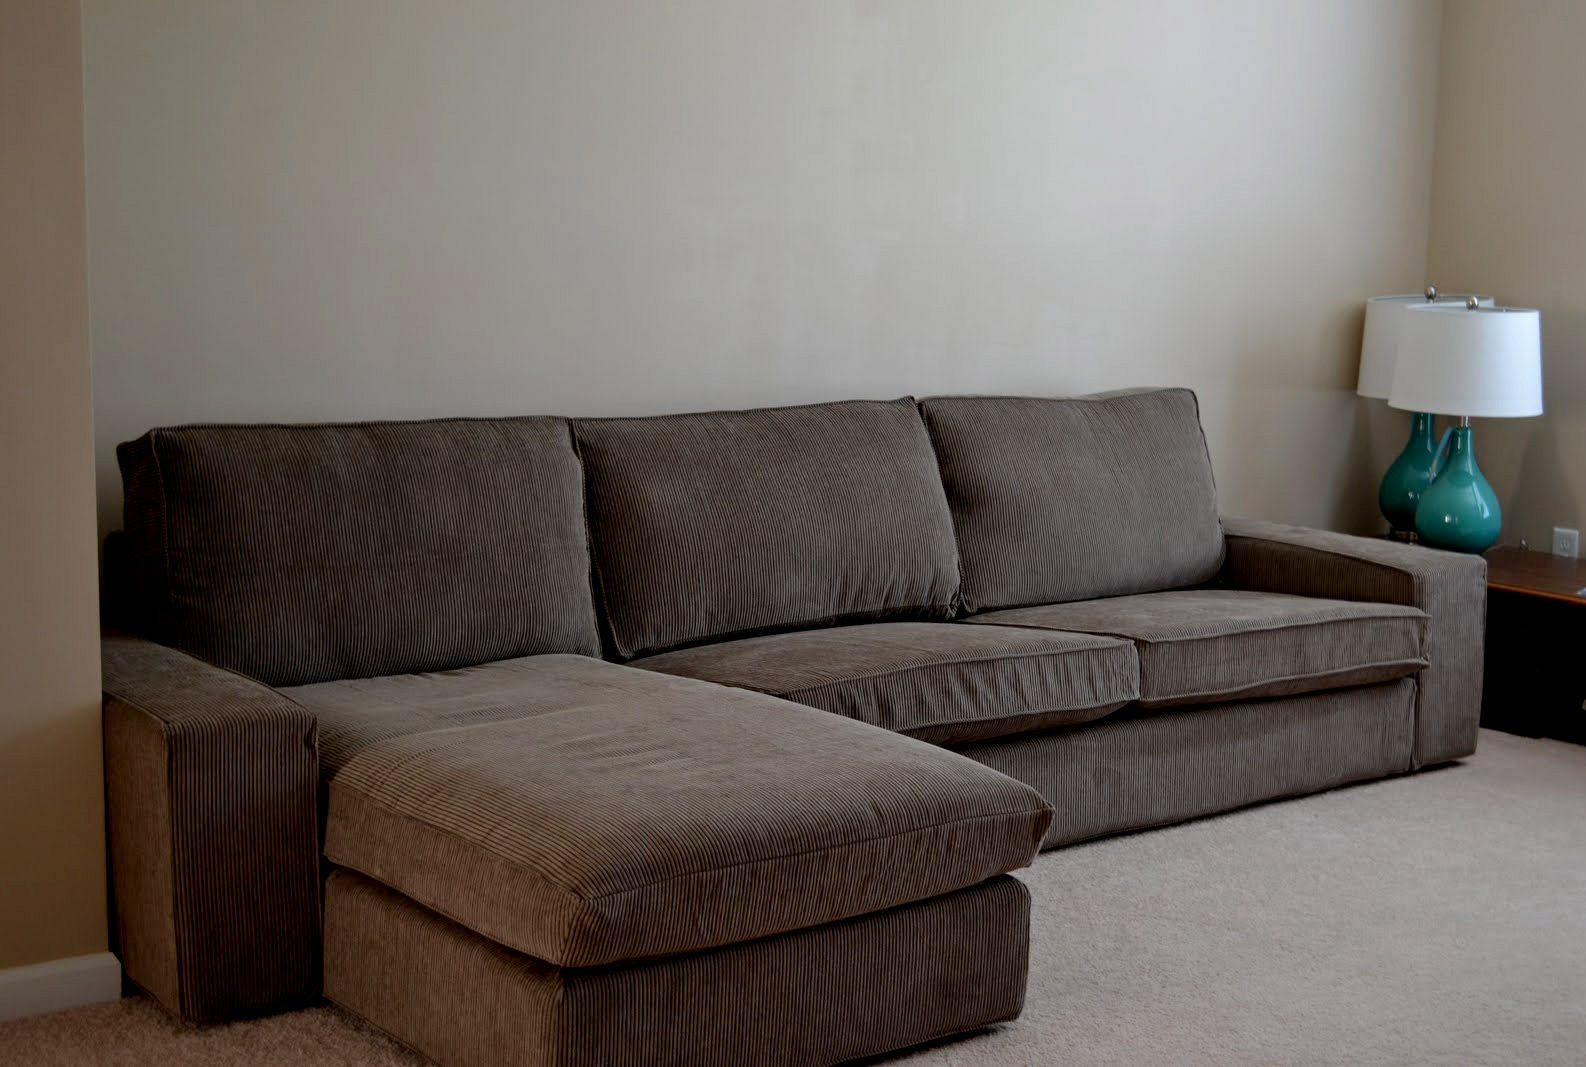

Ikea Kivik Sectional Sofa
- Price: $300 (retails for $1399 unassembled)
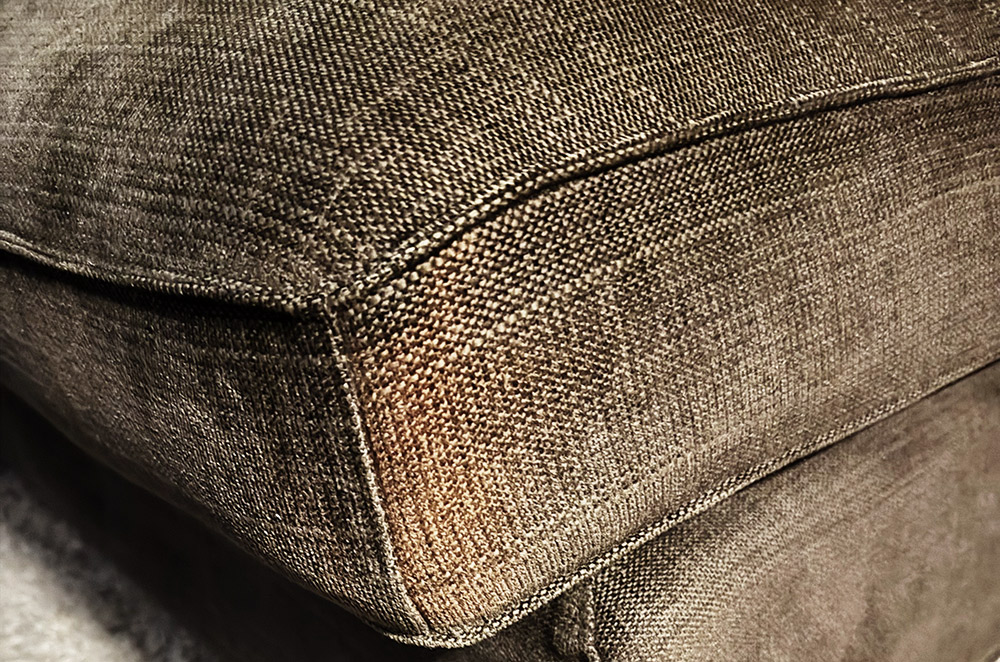
- Condition: Used, but still firm. Some light discoloration in the fabric on the bottom right corner of the chaise (pictured)
- Features: Very comfortable. Guests say it’s more comfortable to sleep on than most beds! Can be disassembled for easier transport. The chaise can be separated from the two-seat piece, and so can both arm rests on either side. Since chaise can be separated, it can go on the left or right side of the sofa, whichever suits your space best. Fabric covers are removable, machine washable, and can be changed. Pet and smoke-free home.
- Dimensions: 32 5/8″ (H) x 110 1/4″ (W) x 64 1/8″ (D)
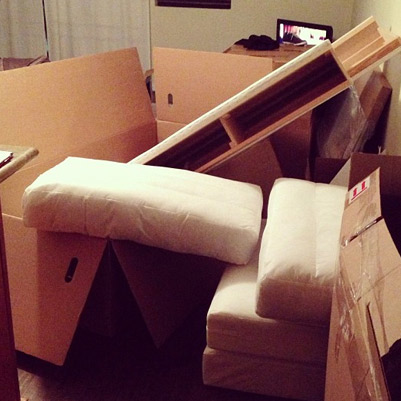
This is how the sofa arrives if you order it unassembled from Ikea. You’re welcome.
Thursday, August 22, 2024

I’m handy as fuck!
My dad isn’t handy at all, so I’ve always built my own furniture and put shit together myself.

One time, I got this Article Caliper Shelf delivered to my apartment in LA. It was huge! I had to piece it out in the lobby, because the box wouldn’t fit in the elevator and I live on the third floor. Several of my neighbors offered to help, but I declined them all. As much as I would’ve loved the assistance, I hate being mansplained even more 😅 Plus, I wanted them to just think of me as ‘the nice, quiet girl in 332’ and I’ve seen putting furniture together test too many relationships!

It was worth it in the end, though. It’s one of my favorite pieces in my studio.
Pammie got a stand-up desk while I was in Spain, so I couldn’t put it together for her. She said it took her five days. When Shi found out, she was like, “Dennis didn’t help you?!” Apparently, it’s Shi’s husband’s job to do that kind of shit. But my sister’s husband is even less handy than she is, if you can believe it. Even though I don’t need a man to build furniture for me, I can’t imagine being married to someone who isn’t good with their hands 😏
All that to say, my sister ordered new mattresses and they’ve been sitting in her living room for weeks. They’re those adjustable ones where each side can sit up or lie down, so she also bought new bed frames that are adjustable. She has to break down her old bed frame and mattress and remove it, so she can put the new bed in her room. They were gonna get rid of their old mattress, but decided to keep it and put it in the guest bedroom where I sleep. I currently sleep on the full bed that came with the house (my sister got the model home). My feet hang over the end of the bed and I can literally feel every spring in the mattress 🥴 My sister’s old bed is memory foam and king-sized, so all my sleep-related problems would be solved 😅
Pammie hired the community handyman to break down her old bed and set up her new one, but he got sick the day he was supposed to come, then she came back from Vegas with Covid when he was rescheduled to come, and now she and her husband are vacationing in Hawaii.


Partly because I wanted to do something nice for my sister, but mostly because I’m tired of sleeping on this god awful bed, I broke down her old bed frame, set it back up in the guest room, and set up her new bed up in her room.
This memory foam cali king is nice, but I miss sleeping in my own bed. I have a nice pillow top dream cloud mattress at home, and a bed frame the delivery guys from CB2 assembled in less than 10 minutes.

I also set up Pammie’s Ring Video Doorbell that’s been collecting dust in her closet for 2 years. I’m only the best sister there ever was 😌

I wanted it to be a surprise when she came back from Hawaii, but I didn’t know where she kept the Ring or where the tools were to disassemble the bed. I was like, ‘Do you know where the 3/16-inch short arm hex key is? Also, what is a short arm hex key?’ 😆
I’m babka tired now, though… The first and only time I made babka, it turned out sooo good. But I didn’t realize how time consuming it was going to be (the dough has to rest and rise twice!), so I didn’t start till 11 at night. I was up at 3 in the morning tired as fuck and near tears (just kidding—I was openly sobbing). So whenever I’m exhausted now, I just say I’m ‘babka’ tired and Pammie knows I’m not fucking around 😴
Anyway, I just doordashed a pizza, so I’m gonna eat it and sleep for a gabillion years ✌🏻

Wednesday, November 28, 2018
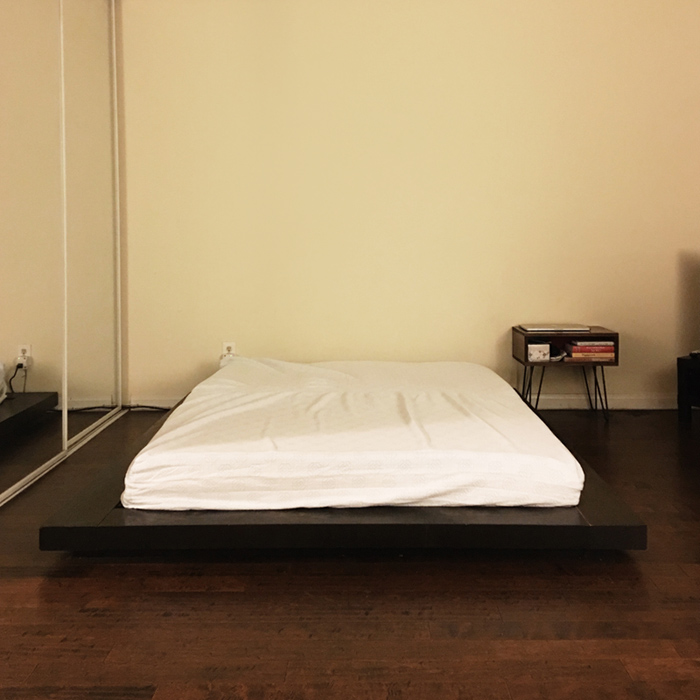
After the most stressful day at work, I decided to chalk this day up as a loss and go straight to bed. When I got home, my new memory foam mattress was waiting outside my door! It was in a box so big, I had to bend time and space (and my back!) to get it into my apartment.
Now I’m just waiting for it to rise and get firm, so I can get on top of it and go to sleep with a smile on my face. What else is new…
Tuesday, September 2, 2014

Earlier this week, I reupholstered the leather cushions on my Roxy Rocker with this gorgeous Harris Tweed. According to Wikipedia, it was “handwoven by islanders at their homes in the Outer Hebrides of Scotland.” I bought it off eBay from some dude in the UK, so it must be legit.
Also, I did all this with a staple gun, and I didn’t even hurt myself! It only took that first staple barely missing my thigh for me to realize that the staples come out of the other end when you shoot it. Yikes.
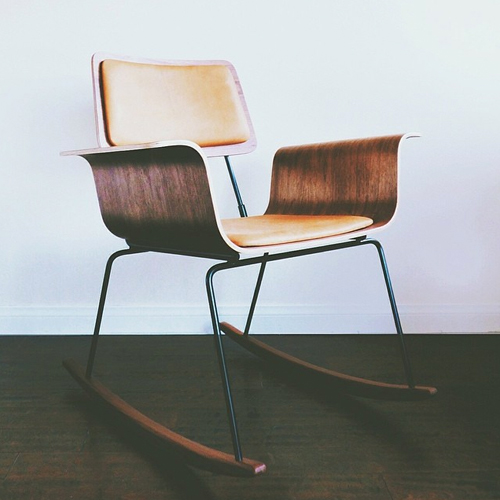
The most beautiful wood I’ve ever sat on ♥
Get yours @ onefortythree!

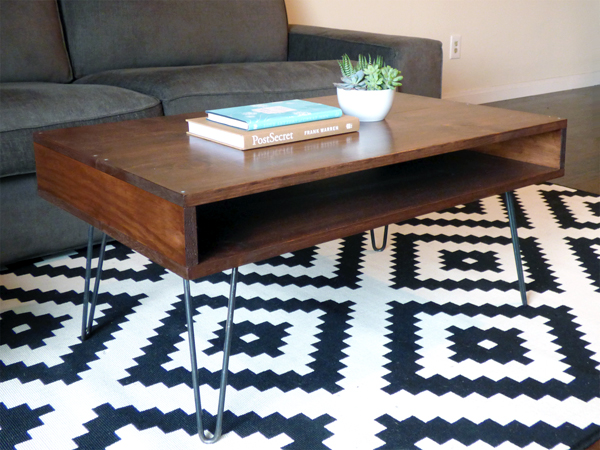
I built this coffee table in an ongoing attempt to lower my Ikea to non-Ikea furniture ratio. Yes, this area rug is from Ikea, but The Great Pizza Box Fire of 2014 destroyed my non-Ikea rug, and I needed an affordable replacement! One step forward, two steps back…
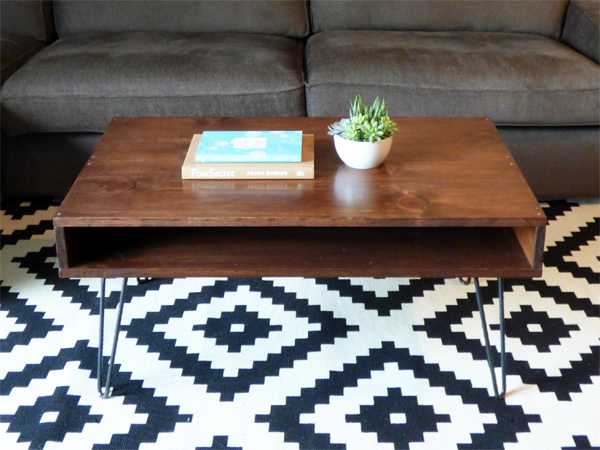
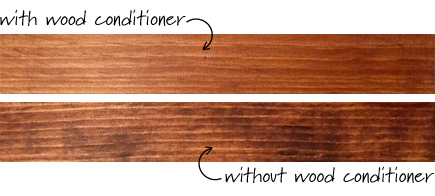
This coffee table was built the same way I built my mid-century modern side table, but with a few modifications. I used pre-stain wood conditioner this time to prevent streaking and blotching. On a bigger job like this, you won’t be able to hide the ugly parts with succulents and a strategically placed Beyoncé print.
You can follow the same directions I used to build the side table. Just be sure to use these new measurements.
MATERIALS & TOOLS:
CUT LIST:
- 2 – 1″x12″-6′ common boards – 4 pieces that are cut 36″ long
(the top & bottom boards)
- 1 – 1″x4″-6′ common board – 2 pieces that are cut 22.5″ long
(the side boards)
Since I already had the gel stain and clear coat left over from building the side table, it only cost me $88 to make this coffee table! That’s cheaper than the Ikea rug it’s sitting on…
(As featured on Buzzfeed, Elle Greece, Marie Claire France, Diply, How To Build It, Nouvelle Daily, Oh So Lovely Blog, List Inspired, Roomed, and Lighter Side of Real Estate)
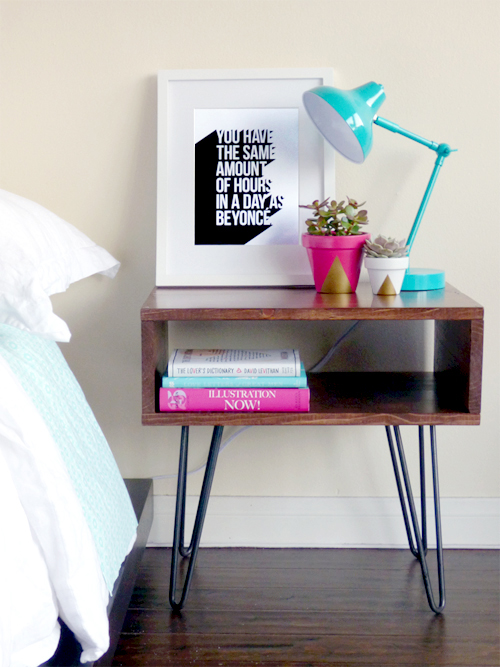
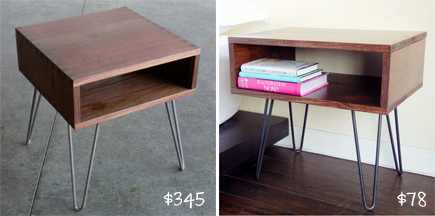
I’m obsessed with all things Mid-Century modern, and when I saw this Co-Mod side table, I knew that I needed it in my life. But it was $345. And sold out. And $345. I felt like that needed to be mentioned twice.
Because I’ve mastered the art of assembling Ikea furniture (and tested many friendships along the way), I thought that I should try building this side table myself. I went to Home Depot, showed them a photo on my phone and was basically like, “HOW YOU DO DIS?” If you act like you don’t know what you’re doing (or you’re like me and you legitimately do not know what you’re doing), the good people at Home Depot will help you. They will tell you what paint brush you should use to apply clear coat. They will tell you what clear coat is. They will even cut your wood down to the exact size that you need at no extra charge.
Building this side table was easier than assembling an Ikea sectional sofa!
MATERIALS & TOOLS:
- 1 – 1″x8″-10′ common board ($14)
- 1 – 1″x6″-6′ common board ($4)
- Wood Stain – I used Minwax Gel Stain in Hickory
-
Clear Coat – I used Minwax Polycrylic in Clear Satin
-
16 – 1.75″ nails
-
4 – Mid-Century modern legs – I used 12″ hairpin legs ($61)
-
Sandpaper
-
Hammer
-
Power drill
CUT LIST:
- 1″x8″-10′ common board – 4 pieces that are cut 20″ long
(the top & bottom boards)
- 1″x6″-6′ common board – 2 pieces that are cut 14.5″ long
(the side boards)
DIRECTIONS:
- Sand your boards. I used 150 grit sandpaper and sanded in the direction of the grain until it felt smooth. After your boards are sanded, wipe them down with a damp cloth to remove excess sawdust before staining them. This is probably something you should do outdoors in a well-ventilated area and not inside your 400 square foot studio during the only weekend it rains in Los Angeles. I still have sawdust in places I didn’t know I could get sawdust.
- Stain your boards. Use gloves unless you want to have to keep explaining to everyone why your hands are brown for the next three days. You can use an old t-shirt, or if you’re a hoarder like me and can’t bear to part with your ‘I ♥ Haters’ shirt, you can get a pack of paint rags from Home Depot for $4 and use those instead. I used one to apply the stain to the wood and one to wipe off the excess. It dries pretty fast, so I was able to coat all sides without waiting. I only applied one coat, but you can apply more if you want it darker. Let the boards dry completely.
- Apply clear coat. I applied it to one side of the boards using a synthetic paint brush. Give it a couple hours to dry, then turn your boards over and apply it to the other side.
- Assemble your side table. Use two 20″ boards for the bottom, two 20″ boards for the top, and the remaining 14.5″ boards for the sides. Here’s a helpful diagram:
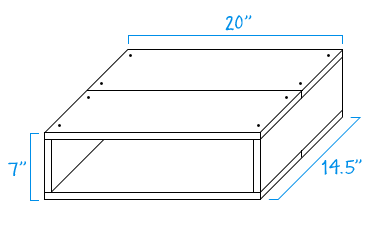
- Nail the two top boards to the long edge of the side boards, and repeat on the bottom. Use two nails on each end of each board as pictured. I had someone hold the boards together for me while I hammered away.
- Mount the legs. I set the legs 2″ from the edges and marked where the screws would go. I pre-drilled pilot holes and screwed the legs on with sixteen 3/4″ screws. Depending on what kind of legs you buy, you might have a different method for attaching them.
You can build your own Mid-Century modern inspired side table for roughly $78 (for just the wood and the hairpin legs, if you happen to have the other materials). You really can’t beat that price or the sense of accomplishment you’ll feel after building something with your bare, wood-stained hands.
Other things pictured:
Painted succulent pots designed by me (DIY tutorial here)
Task lamp from Target
Beyoncé print designed by me (sold on Etsy)
Bedding from Anthropologie
Bed from West Elm (discontinued!)
